A little chili goes a long way

8 Mar

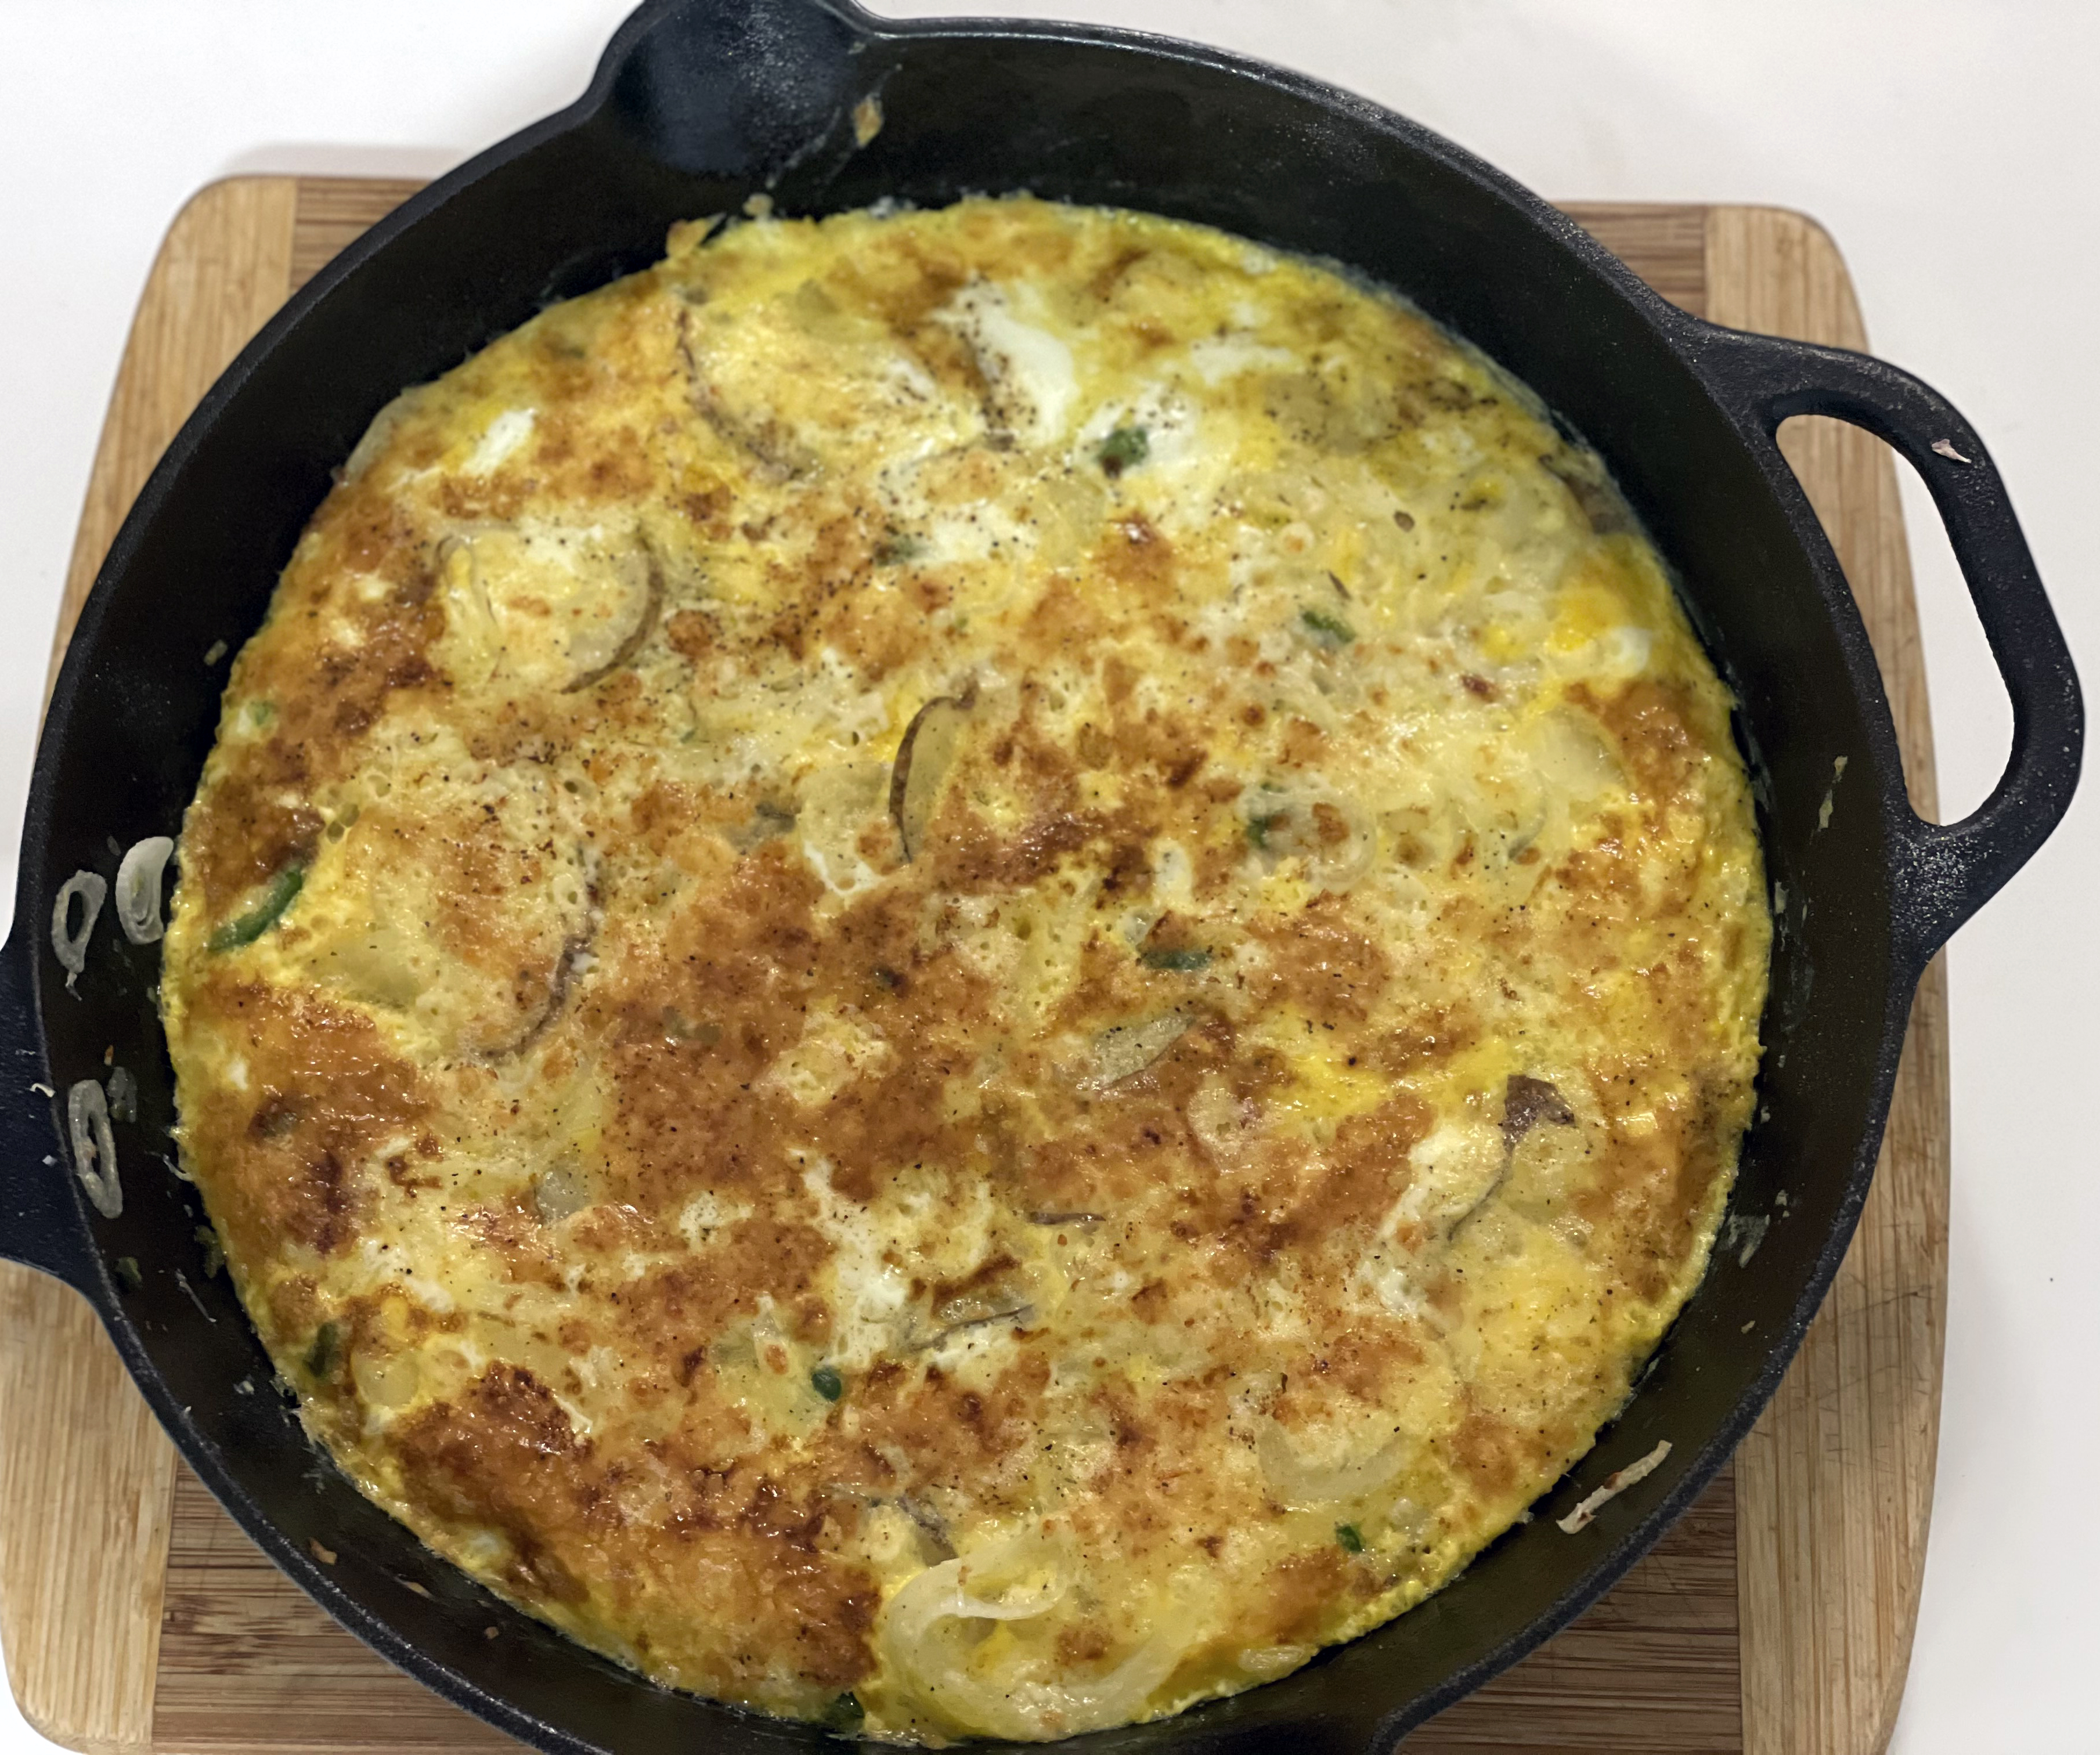
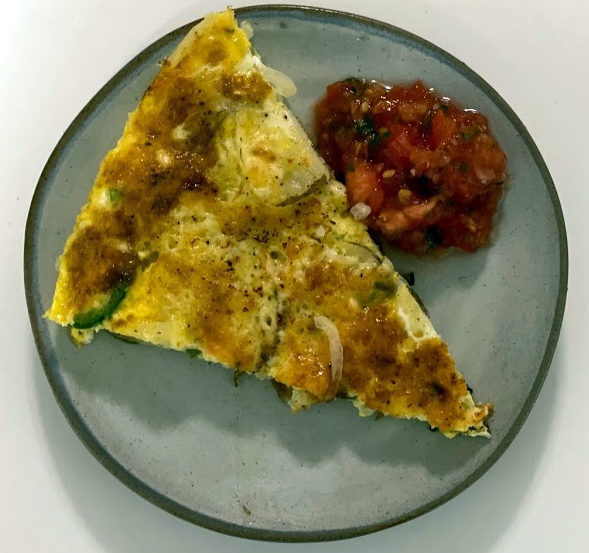
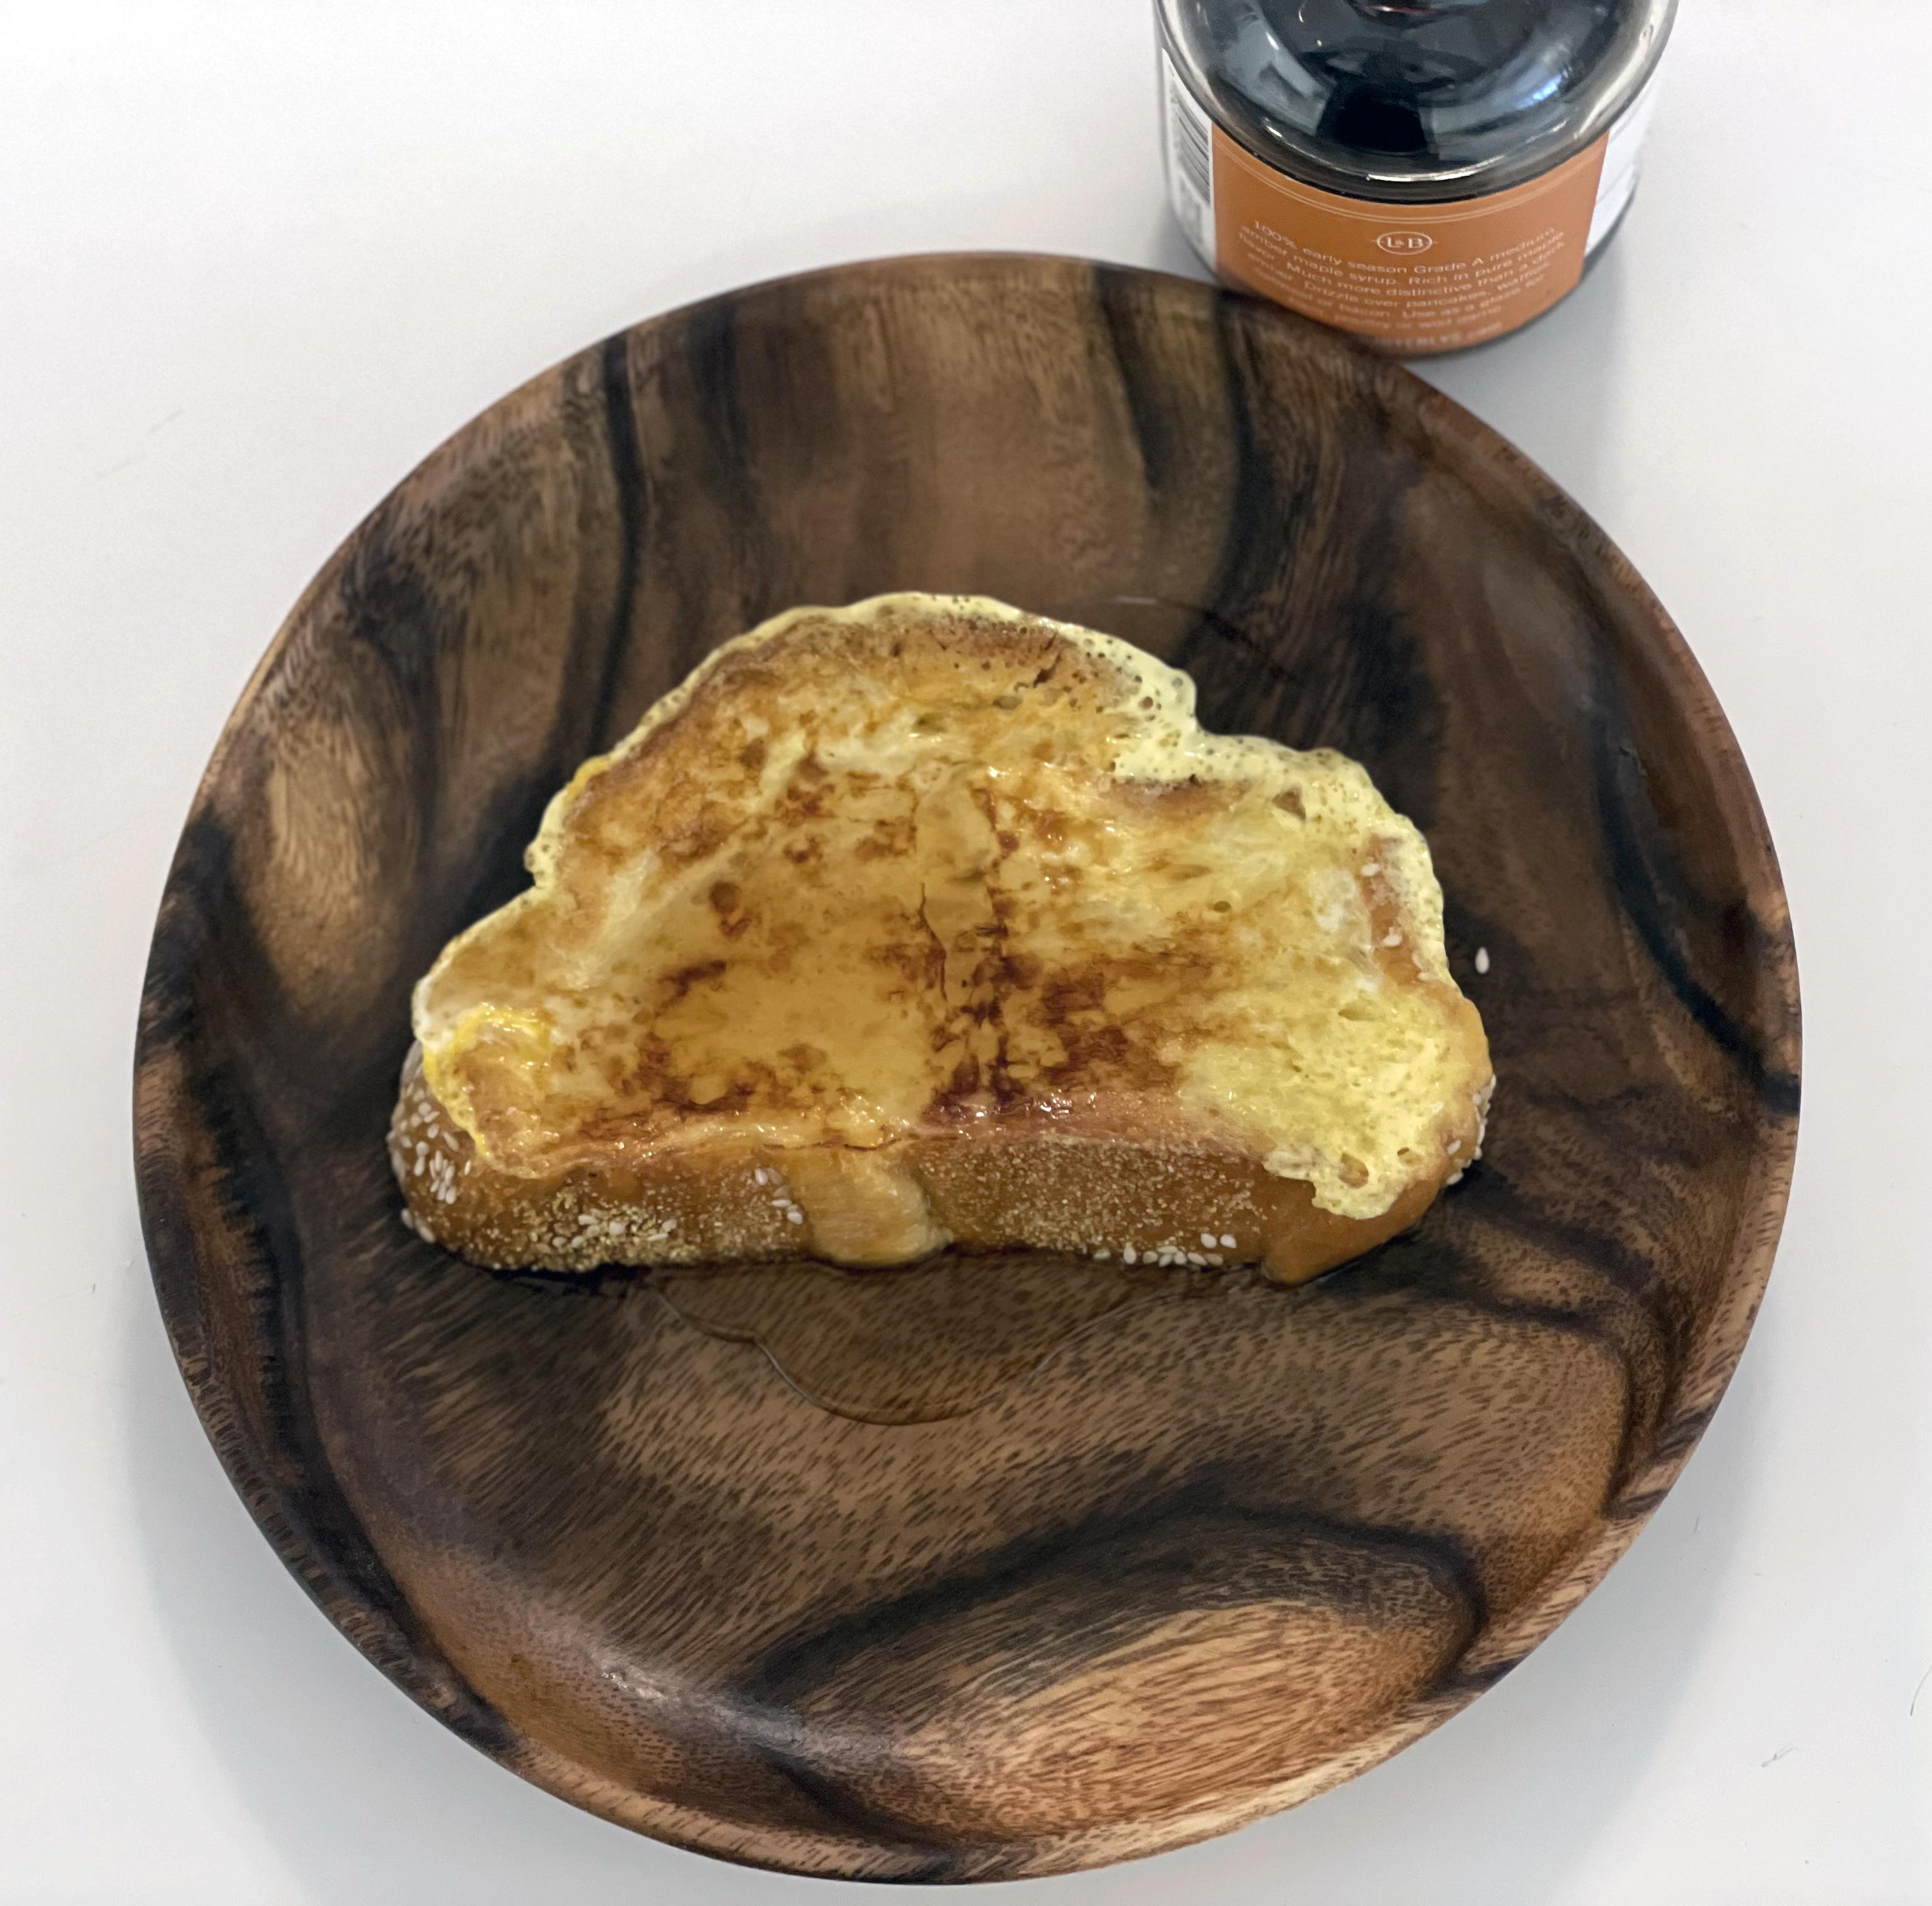
I found Best-ever Appetizers, Starters & First courses by Christine Ingram (2003) for $5.99 on a local bookstore’s bargain table several years ago. The pictures are wonderfully descriptive and the cookbook offers dozens of never-seen before recipes that I’ve tried through the years. This time I opted for a quiche-like recipe for a meatless Monday. And I wasn’t disappointed. Easy to throw together and just enough spice thanks to the jalapenos and salsa. It was even better cold the next day for lunch. I used a cast-iron skillet and ran it under the broiler to brown the top before bringing it to the table! It’s got enough “bite” and flavor so you won’t miss the meat! Great warm or cold.

Chili Cheese Tortilla with Tomato Salsa

3 tablespoons olive oil

1 small onion, thinly sliced

2-3 jalapeno chiles, sliced (or less)

7 ounces cold cooked potato, thinly sliced*

1 cup (generous) grated Manchego, Mexican queso blanco or Monterey Jack cheese

6 eggs, beaten

Salt and ground black pepper, to taste

For the Salsa

 1¼ pound fresh flavorful tomatoes, peeled, seeded and finely chopped

2 garlic cloves, crushed

3 tablespoons chopped cilantro

Juice of 1 lime

½ teaspoon salt

Make the salsa. Put the tomatoes in a bowl with the rest of the ingredients. Mix well and set aside.

Heat half the oil in a large omelet pan and gently fry the onion and jalapenos for 5 minutes, stirring once or twice until softened. Add the potato and cook for another 5 minutes until lightly browned, being careful to keep the slices whole.

Using a slotted spoon, transfer the vegetables to a warm plate. Wipe the pan with paper towels, then pour in the remaining oil. Heat well and return the vegetable mixture to the pan. Sprinkle the cheese the top. Pour in the beaten egg, making sure that it seeps under the vegetables. Cook the tortilla over low heat until set. Serve in wedges, garnishing with fresh herbs, with the salsa on the side.

*One large or two small potatoes. I scrubbed two small potatoes and threw them on the cookie sheet on which I was roasting cut-up potatoes the night before. When cold, it’s easier to thinly slice the potato – I used my trusty mandoline!

Toss this one around

6 Mar

Over the years I’ve eliminated more and more convenience foods from what I make and eat. I like knowing exactly what’s in dishes I eat – and clearly if you’ve read the ingredient listing on most bottled salad dressings you probably are surprised by what you see. One of the first cookbooks I purchased was Julia Child & Company (1978) and boy was I intimidated by the recipes. To be honest, I’m pretty sure I never prepared a single one. Until now. Yep, Julia Child’s salad dressing is simple, with everything I have on hand and a cinch to prepare. Vary the herbs you add for different flavor notes. Brush it on fish, noodle and pasta salads – or even drizzle on steak. Love the fresh taste and knowing what I’m eating!

Vinaigrette Salad Dressing

2 -3 teaspoons shallots or scallions

1/2 teaspoon dry mustard

Grinds of fresh pepper to taste

1/4 teaspoon salt, or to your taste

1 tablespoon red wine vinegar; more as needed

1 tablespoon fresh lemon juice

1/2 cup best-quality olive oil, new fresh peanut oil or other oil of impeccable quality

Fresh herbs of your choice, such as tarragon, chervil, or basil

Beat together with a whisk or shake in a screw-top jar. Correct seasoning to your taste both before and after dressing your salad. May be made somewhat in advance, but it is never a good idea to let salad dressing sit around for more than a day or two; it loses its freshly made quality.

Cook’s note: it kept well refrigerated for four days!

A Challah story 30 years in the making

5 Mar

Searching for and preparing recipes from my cookbook collection has been an interesting journey full of surprises. Yesterday I unearthed a cookbook that my son, Jay, created in third grade. Titled Cooking Around the World, the spiral-bound paperback cookbook is filled with recipes from students at Meadowbrook Elementary School in Golden Valley, Minnesota in 1991. My son’s original artwork on the cover depicts his recipe for Challah that’s inside. And the recipe is handwritten by him (see pictures below). I no doubt contributed this recipe, but I have no recollection of its origin. It should be noted that Jay is a married father of three – the oldest in third grade and turning nine this month – same as her dad 30 years ago when this book was “published!”

Not familiar with Challah? It’s an egg-rich yeast-leavened bread that is usually braided or twisted before baking and is traditionally eaten by Jews on the Sabbath and holidays.

I have shared here repeatedly that I’m not terribly successful at baking. Cooking, yes. Baking, not so much. And I have baked dozens of challahs over the years without being enamored with any of the results. But I knew I had to try this recipe. And much to my surprise, it was easy – rising times were shorter than customary – and the end results stunned me! Yikes – the “crumb” as experts call it – is nearly perfect – and the crust browned up beautifully and it slices like a dream. In fact I did not pick up my standing order for challah bread today because I MADE MY OWN! Who knew?

Challah by Jay Sandler

1 package yeast

5 cups flour

1 teaspoon salt

⅓ cup sugar

1¼ cups warm water

⅓ cup oil

2 eggs

1 cup golden raisins

1 egg mixed with 1 tablespoon water

Optional: sesame or poppyseeds

Combine yeast with 1½ cups flour, salt and sugar in a large bowl. Stir and pour in water. Beat until smooth. (Can be done by hand or with a stand mixer – I used a mixer). Add oil and eggs, throw in raisins and gradually add enough flour to make a soft dough. Continue mixing until mixture forms a ball, remove from bowl and knead on floured board about 10 minutes, adding flour as needed. Texture should be elastic. Place dough in a greased bowl, turning so that the greased end is on top. Cover dough with a dish towel and let rise, til doubled about one hour.

Punch down and divide dough into two equal parts. Roll out each part into a snake-like strip. Twist strip around to make a spiral shape tucking end into center of the spiral. Repeat with remaining dough (I opted instead to braid the second loaf – from three strips). Place on greased cookie sheet. Cover with a dish towel and let rise again, one hour. Brush with egg and water mixture and sprinkle with sesame or poppy seeds (optional). Bake at 350 degrees for 35 (check at 25) minutes.

Note from Jay: my mom makes this special bread on Friday, the Jewish Sabbath.

Spring chicken

4 Mar

I continue to be on the look-out for easy and enticing ways to prepare the proverbial boneless chicken breast! And yes, I found what looked like a must-try in The New Temple Treasures Cookbook (1991). This book was compiled by Temple Israel Sisterhood in Minneapolis – another one of those local cookbooks with recipes by real people like you and me. I’ll admit I was a little taken aback by one of the ingredients, but also intrigued. As you can see from the picture below, the end result is gorgeous! Swoon-worthy buttery phyllo dough stuffed with fork-tender chicken – thanks to that secret tenderizer – mayonnaise. Phyllo dough is surprisingly forgiving. But you need to work fast so it doesn’t dry out. I’ll definitely be making these for company – once life as we knew it – resumes. I plan to try this same recipe – but with salmon!

Phyllo Chicken Packets

3/4 cup chopped green onion

1/2 cup mayonnaise

3 tablespoons lemon juice

3 cloves garlic, minced

3/4 teaspoon dried tarragon

2/3 cup butter or margarine, melted

6 chicken breasts, uncooked, boned and skinned

Salt and pepper to taste

12 sheets phyllo dough, thawed

2 tablespoons grated Parmesan cheese.

Mix together green onion, mayonnaise, lemon juice, 2 cloves garlic and tarragon; set aside. Combine remaining garlic with butter/margarine. For each packet, place 1 sheet of phyllo on a board and brush with garlic butter. Arrange a second sheet of phyllo on top and brush with garlic butter. Lightly sprinkle chicken with salt and pepper. Spread one side of chicken breast with some of the mayonnaise mixture; place chicken in top corner of phyllo, mayonnaise side down, and cover other side with mayonnaise mixture. Wrap chicken (burrito-style, tucking in ends) in phyllo. Place chicken packets on an ungreased baking sheet a few inches apart. Brush with remaining garlic butter. Sprinkle with Parmesan cheese. Bake at 375 degrees for 20 – 25 minutes.

Note: Recipe can easily be halved.

Orange is the new vegetable

4 Mar

Winter is tough for a veggie lover like me. Minnesota climate is not conducive to homegrown vegetables a good six months out of the year. Sure I can spend the bucks to buy my favs like zucchini, asparagus and eggplant which are imported from warmer states. And I do. But where I really struggle is trying to add a simple vegetable side dish to round out a meal. Thank goodness for Trader Joe’s Canned Corn! Before you scoff at the suggestion – try a can. Honestly it tastes like fresh picked. But we can only eat so much corn.

Leafing through another one of those cookbooks in my collection that dates back to my early married years, the McCall’s* Cook Book (1963), I turned to the vegetable recipes in hopes of finding some inspiration, and lo and behold I found a quick and easy preparation for sliced carrots – with ingredients I always have on hand. This a super simple recipe – that will add color and sweetness to your dinner plate. Did I mention they are delicious?

Carrots in Mustard Glaze

3 pounds carrots

Boiling water

¼ cup butter or margarine

½ cup light-brown sugar, firmly packed

¼ cup prepared mustard

2 tablespoons chopped chives, mint or parsley

Wash carrots; pare; cut diagonally into 1-inch slices

Place carrots in a large saucepan. Add boiling water to measure 1 inch; simmer, covered 20 minutes or until tender. Drain if necessary (most of liquid will be evaporated). Meanwhile, in a small saucepan, combine butter, sugar, and mustard. Cook, stirring, until butter melts and sugar is dissolved; continue cooking 3 minutes. Pour mixture over carrots, tossing gently to combine. Heat several minutes, and then add chopped chives (mint or parsley).

*I loved reading McCall’s Magazine which ceased production in 2002. When I was a little girl I was obsessed with paper dolls and couldn’t wait to open the latest issue to see the new outfits for Betsy McCall, a beloved paper doll figure!

This is fish(ing) for a compliment

2 Mar

Ina Garten’s latest cookbook Modern Comfort Food (2020) is like all of her books, a culinary wonder filled with recipes I am anxious to try… like the Seared Salmon with Spicy Red Pepper and Waffle Iron Hash Browns. But as I paged through the book I remembered my friend Randee’s sterling endorsement for the book’s cod recipe. Truth be told, I love seafood and salmon but most other fish – unless it’s battered and fried – no thanks! But I’m supposed to be branching out and being open to new dishes on this blog (my self-imposed rules) so I settled on the cod recipe. Not only does it look stunning, it is unbelievably delicious. The topping is the corker – creating a yin and yang of flavors and textures – succulent melt-in-your-mouth flakey fish with a crunchy, savory coating. Note, cod is routinely on sale for $9.99 a pound – a bargain these days. The recipe may look complicated but it’s anything but. A must try! Even if you aren’t a fish fan!

Baked Cod With Garlic & Herb Ritz Crumbs

Good olive oil

4 center-cut boneless, skinless cod fillets (6–8 ounce each)

Kosher salt and freshly ground black pepper

½ cup Ritz cracker crumbs* (15 crackers)

⅓ cup panko (Japanese bread flakes)

2 tablespoons minced fresh parsley

2 teaspoons minced garlic (2 cloves)

1 teaspoon grated lemon zest

3 tablespoons unsalted butter, melted

¼ cup dry white wine, such as Pinot Grigio

2 tablespoons freshly squeezed lemon juice

Lemon wedges, for serving

Preheat oven to 400°F. Pour 2 tablespoons of olive oil in 9″ x 9″ ceramic baking dish (it should be just big enough to hold fish) and tilt dish to coat bottom with oil.

Place fish fillets in dish and turn to coat both sides with oil. Sprinkle fish with 1½ teaspoons of salt and ½ teaspoon of pepper and bake for 10 minutes. Meanwhile, in small bowl, combine cracker crumbs, panko, parsley, garlic, lemon zest and 1 teaspoon salt. Add melted butter and stir until evenly moistened. Set aside.

Remove fish from oven and pour wine and lemon juice directly on fillets. Pat crumb mixture evenly onto fillets, pressing gently to help it adhere. (Don’t worry if some crumbs get into the sauce!) Return pan to oven for 12 minutes, until fillets are just cooked through in center, depending on thickness of fish. Sprinkle with salt and serve hot with pan juices and lemon wedges.

*Pulverize the crackers in a food processor or place in a plastic bag and use a mallet or rolling pin to make crumbs.

No points for these brownies

2 Mar

I made a commitment to be honest when I started this blog on January 1. I shared that I am not the best baker. In fact I’ve posted several recipes bemoaning my lousy baking skills. Today I’m sharing the failure of not one but two recent baking attempts. First was for meringue cookies. I should have figured the end result would be unsatisfactory when the meringue failed to achieve those coveted stiff peaks. And the mounds of meringue I carefully squeezed out of a pastry bag with a star tip came out flat as a pancake – and to add insult to injury, stuck to the cookie sheet. I’m not even going to waste space here providing that useless recipe. And I will NEVER attempt meringue cookies again (you read it here).

Determined to offer a “sweet” recipe – I next selected a basic brownie recipe from the Hershey’s 1934 Cookbook (1992). I bought the book when my husband I visited Hershey’s Chocolatetown in Hershey, Pennsylvania in 2008. My husband – a longtime Little League volunteer – and I were en route to Williamsport, Pennsylvania, home of Little League Baseball. Of course I had to have a souvenir (along with some Hershey’s Kisses). I selected this particular recipe primarily because I had all of the ingredients on hand – and well, it’s easy and looked failproof. While the brownies were a dream to cut and remove from the pan (often a struggle) – they were dry and pretty bland. They remind me of the brownies my daughter and I baked every year at a Girl Scout event. I apologize that today’s recipe doesn’t come with a glowing endorsement. In fact, please do not bake these brownies – there are dozens of great recipes out there. But don’t they look great in the picture?

Chocolate Syrup Brownies

1 egg

1 cup packed light brown sugar

3/4 cup Hershey’s Syrup

1 1/2 cups all-purpose flour

1/4 teaspoon baking soda

Dash salt

1/2 cup (1 stick) butter, melted

3/4 cup chopped pecans or walnuts

Heat oven to 350 degrees. Grease 9-inch square baking pan. In small mixer bowl beat egg; add brown sugar and syrup, beating until well blended. Stir together flour, baking soda and salt; add to egg mixture, beating until well blended. Fold in butter and nuts. Spread batter into prepared pan. Bake 35 to 40 minutes or until brownies begin to pull away from sides of pan. Cool in pan on wire rack. Cut into squares.

Baker’s note: Anytime you are saddled with bland brownies – top them with ice cream and hot fudge. No one will notice the brownies are subpar.

Frie-licious

28 Feb

My husband loves potatoes. Baked. Mashed. Au gratin. Roasted. And especially “fried” as in French fries. Thanks to the air fryer (my children decided I couldn’t live without so they gave me one last Mothers’ Day), I have expanded my potato repertoire. You can skip the oil when using an air fryer…but let’s be honest here, actual “fried” potatoes are soooo good! And surprisingly you don’t need a lot of oil to get that satisfactory crunchy outside and tender inside!

I found this recipe in Two At The Table by Cheryl Fall (2007), a cookbook for couples now that the kids are gone. I don’t remember buying it but I must have thought I needed some guidance. It was an adjustment going from cooking for six to five, then four, then three, then two initially. I’ve learned to scale recipes when I want, but sometimes I aim for leftovers. And I love cooking for crowds at holiday time. I do recommend this book no matter how many you are cooking for – and yes, it’s still available in bookstores and online.

Stubby Oven Fries with Easy Garlic Aioli

For the Fries:

2 to 3 small russet potatoes

2 tablespoons olive oil

¼ teaspoon granulated garlic

Salt and freshly ground pepper

For the Garlic Aioli:

2 tablespoons mayonnaise

1 clove garlic, minced

¼ teaspoon dried parsley flakes

Preheat oven to 425 degrees. Cut each potato lengthwise into wedges about ½ inch thick. In a bowl, toss the potato wedges with the olive oil, granulated garlic and salt and pepper to taste, coating each potato wedge thoroughly. Arrange the potatoes in a single layer on a baking sheet. Bake the potato wedges for 15 to 20 minutes, or until cooked through and golden brown. Meanwhile in a small bowl, combine the aioli ingredients. Mix well.

Serve the hot fries with the garlic aioli for dipping.

Note: Don’t skip the aioli. It’s a great addition.

I propose a (French) toast!

27 Feb

Breakfasts bore me. I love eggs, fruit, yogurt, cereal, oatmeal….all the traditional choices but e-v-e-r-y d-a-y? Yet I admit I’m often in a hurry (pre-COVID) or too lazy (lately) to make a real breakfast like Huevos rancheros or Shakshuka. I was flipping through another one of those Better Homes and Gardens Encyclopedias of Cooking (Volume 7, Eng to Fru) 1970 in my cookbook collection when I landed on French Toast.

I remember making French toast for my four kids when they were growing up. Which means it had to be fairly easy and quick – because morning were always chaotic. Can’t remember when I last made myself a piece! I have no shortage of recipes for fancy variations like overnight French toast that magically puffs up when you bake it (yes you can email me if you want that recipe).

But the simplicity of this basic recipe called to me. Saturday mornings I can count on having day-old Challah bread and the other three ingredients are kitchen staples. Yes, four ingredients total, even though you will see five listed below. You do not need butter or oil to make French toast. Instead, spray your pan with nonstick spray – I use a small stainless steel skillet. No, you don’t need a nonstick skillet. Heat the pan over medium heat and add the egg-dipped bread slice(s). Here’s the tricky part. Let the egg cook long enough that the toast will release from the pan. Gingerly lift one corner to test if it’s ready to release. Flip and brown the other side. The whole process takes a couple of minutes. Recipe can be halved.

French Toast

2 slightly beaten eggs

1/2 cup milk

1/4 teaspoon salt

Day old bread

Butter or oil (I recommend skipping this last ingredient!)

In a shallow bowl combine eggs, milk and salt. Dip bread into milk-egg mixture (enough for 4 to 6 slices of bread). Fry ( in small amount in hot shortening – butter or oil – or coat pan with nonstick cooking spray) in skillet till golden brown. Serve toast hot with maple syrup, confectioners’ sugar, or tart jelly as desired.

Note: Where did the moniker French toast come from? Many explanations – all different. I like this one the best! According to legend, it was a man named Joseph French. He created the dish in 1724, and advertised it as “French Toast” because he was grammatically inept and forgot the apostrophe.

This ain’t no Dixie Chicken!

26 Feb

My father was one of the original grill masters. Seriously. He could turn an ordinary piece of meat into gourmet fare. His smoked turkeys were legendary. Pink and so moist on the inside. Skin that you couldn’t resist eating. So when he passed away in 2011 I grabbed this cookbook from his collection. And finally opened it this past week and found dozens of recipes I cannot wait to try – particularly when there’s no longer snow on the ground!

This recipe sounds more complicated than it is – but the best part is you can prepare it the day before. In fact you must prep it the day before to have the optimum results. And don’t assume it’s super spicy just because it sounds like it is! The end result is a fork-tender moist chicken with a perfectly crunchy crust. The book is Born to Grill (1998) by Cheryl Alters Jamison and Bill Jamison. The book is still available in both hardback and paperback on Amazon and other book sites.

Hearty Ranch Chicken Halves

Ranch Paste:

2 tablespoons butter

2 tablespoons Worcestershire sauce

1 tablespoon paprika

1 tablespoon minced canned chipotle chiles and 1½ teaspoons adobo sauce from the can

1 teaspoon Tabasco sauce or other hot pepper sauce

1 teaspoon kosher salt or other coarse salt

½ teaspoon dry mustard

Two 3-pound to 3¼ pound whole chickens, halved

Ranch Baste:

2 tablespoons Worcestershire sauce

1 tablespoon water

At least 3 hours and up to the night before you plan to grill the chicken, prepare the paste, first combining the ingredients in a small saucepan. Warm over medium heat just until the butter melts and the mixture can be blended evenly. Refrigerate the mixture for a few minutes until it becomes the consistency of room temperature butter. Massage the chicken halves thoroughly with the paste, rubbing it inside and out and working it as far as possible under the skin without tearing the skin. Place the halves in a plastic bag and refrigerate.

Fire up the grill, bringing the temperature to medium (4 to 5 seconds with the hand test). Remove the chicken from the refrigerator and let it sit covered at room temperature for about 30 minutes. Mix together the baste, combining the Worcestershire sauce and water. Transfer the halves to the grill and arrange them skin-side up. Grill uncovered over medium heat for about 20 minutes, without turning, then cook an additional 30 to 40 minutes, turning every 5 to 10 minutes and ending with the chicken skin-side down for a final crisping. (You want the chicken skin to face the grill enough to render the fat and brown, but not burn). Watch for flare-ups, shifting the halves away from the flame if necessary. Brush or spritz the baste over the chicken’s cavity about halfway through the cooking. If grilling covered, cook the chicken starting skin-side up over medium heat for about 15 minutes, without turning, then cook an additional 25 to 30 minutes total, turning three times and brushing or spritzing the baste over the chicken’s cavity about halfway through the cooking. Arrange the chicken halves on a platter and serve immediately.

Note: Recipe for those luscious French Fries will be on a future blog!